
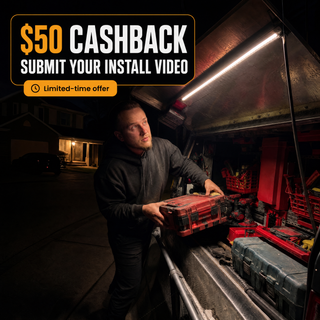
In 2026, more crews are ditching the “good enough” shop lights because flexible LED strip setups are now the most used format, holding 67.4% market share due to how well they handle installs on rugged truck canopies and toolboxes.
Key Takeaways
| What you get | Why it matters for a truck canopy |
|---|---|
| No wiring, no drilling | Keeps the install clean on a canopy, cap, or tray, and avoids messing with factory hardware. |
| Battery-powered (18V platforms) | Runs off batteries you already own (Milwaukee, DeWalt, Makita 18V). |
| Wide, even light distribution | The goal is “see the whole area,” not just brighter numbers. |
| Peel-and-stick mounting | Fast fit, holds up in real worksite dust and rain (IP66 rated options). |
| Simple fitment workflow | Plan the placement, mount the bar, clip to battery, and you are done. |
- Best “truck canopy LED strip installation” approach in 2026: light distribution first, then placement, then battery compatibility.
- Read fitment before buying: check batteries, adapter style, and whether you want a bar or strip-style kit via our FAQ on fitment & batteries.
- Use the install guide: we lay out the process in plain steps at LumoLux install guide.
- If your canopy has curves or edges: measure twice, plan for corner-to-corner coverage.
- Need a real person? ask us directly through our contact page.
What “truck canopy LED strip installation” should accomplish (not just how it looks)
The reason a lot of installs fall flat is simple. People focus on brightness, then wonder why the truck bed or toolbox still feels dark.
For truck canopy LED strip installation in 2026, your win condition is where the light lands. You want even coverage so you can find your gear without hunting by headlamp or phone flashlight.
“The real problem is not brightness. It is where the light comes from.”
That is why the best systems are designed to flood the space with even light, mounted flush along your truck cap or tray, so you get wide-angle coverage instead of stripes that leave dark corners.
Choose the right kit for your canopy, cap, or tray (and your battery platform)
Truck canopy LED strip installation gets easier when your kit matches your setup. If you already run 18V tool batteries, you should not have to build an electrical project just to turn the lights on.
For example, the Lumo-300 is a battery-powered work light built for dark truck caps and toolboxes. It uses a single 300mm bar and delivers 900 lumens corner-to-corner light, powered by the 18V tool battery you already own, with an adapter that clips into your battery platform.
We built our kits around the most common 18V systems, so the “install” part stays the install part. No wiring. No tool mess. No long nights troubleshooting.
- Works with: Milwaukee, DeWalt, Makita 18V (via adapter)
- Mounting: peel-and-stick style, designed for fast fitting
- Fit time target: about two minutes
- Durability: IP66-rated for tough worksite conditions
If you are shopping the lineup, start from the battery-powered LED lighting kit collection to compare how each option is meant to mount and cover your space.
Best placement for truck canopy LED strip installation: corners, edges, and “no dark corners” coverage
Placement is where the job gets won or lost. If you mount the light too high, too low, or aimed straight down one line, you end up with shadows where you store tools and sockets.
In a proper truck canopy LED strip installation, you plan for how people actually work. You grab, open, reach, set items down. Your lights need to stay useful across that motion.
- Mount along the long edge: it helps throw light across the lot of drawers and compartments.
- Keep it flush: flush mounting along the cap or tray helps reduce weird glare and uneven hotspots.
- Cover the corners: corner-to-corner coverage beats “one strip” coverage every time.
- Avoid aiming at the sky: you want the beam to land on your work, not just light up dust.
One of our contractor tips is simple: when you are planning your truck canopy LED strip installation, prioritize where the light comes from, not chasing lumens alone.
Step-by-step truck canopy LED strip installation (the quick, clean way)
This is the workflow we like because it does not waste your time. You should not be fumbling with wires or hunting for tools at a jobsite.
We designed our kit installs around that reality: open it, stick it in, clip on a battery. Done.
- Prep the mounting area: clean the surface so the adhesive can actually bite (dust and grime kill hold strength).
- Plan your line: decide where the bar sits to flood the space. Corner coverage matters.
- Mount the LED bar/strip: peel, place, press. Keep it flush to reduce glare and hotspots.
- Clip to your battery: use the included adapter that matches your 18V platform (Milwaukee, DeWalt, or Makita 18V).
- Test before you lock in habits: turn it on, check coverage, adjust position if needed while you still can.
- Run it on the job: you get bright, even light so you can find your gear on the blackest 5am start.
Want the official version? Use the plain steps in our install guide so you follow the exact process for your kit.
Wiring-free vs. “real wiring” installs: what to avoid on truck canopies
Truck canopy LED strip installation can go one of two ways. Wiring-free and straightforward, or wiring-heavy and risky.
Here is what you should avoid, especially on a canopy or cap where vibration, weather, and access points are part of the daily grind:
- Splicing into truck wiring without a plan: it adds failure points, and it turns a 2-minute job into an all-night chase.
- Running exposed cables through gaps: dust, water, and movement find weak spots fast.
- Using flimsy mounts: vibration loosens poor adhesive and cheap hardware over time.
- Ignoring battery compatibility: if the adapter does not match your battery platform, you end up stuck before you start.
With the battery-powered approach, you keep the install clean. No wiring. No tools. Just click it in and light it up.
LumoLux LED light bars and how they fit a “truck canopy LED strip installation” use case
When people say “LED strip,” what they really want is strip-style utility, wide-angle coverage, and an install that does not turn into a project.
LumoLux products are built for dark truck caps and toolboxes, with mounting designed to be quick, straightforward, and tough enough for real worksite conditions.
Lumo-300 is our go-to example because it is made to be fitted fast, powered by the batteries you already have, and aimed for even corner-to-corner light. It also gives you 3 brightness modes for every job, so you can dial it down when you do not need full blast.
If you want to compare pricing, you can check the current Lumo-300 price page. It lists for $79.00, and if you are watching drop pricing, we also run batch offers (so you can sometimes pay less than full retail).
On the “drop” side, you can review batch pricing details at the US drop page.
How long should truck canopy LED strip installation lighting last in 2026?
Most people think about brightness first. Smart crews think about lifespan because you do not want to redo mounting work after the first rough season.
Modern rugged flex LED strip setups are commonly rated for long life in demanding environments. One durability benchmark for flex LED strip style lighting is 100,000 hours of usable runtime in rugged conditions, which is why these setups keep showing up for worksite truck lighting in 2026.
With that kind of lifespan thinking, the install effort matters less because the light should stay reliable across years of dust, rain, and rough handling without skipping a beat.
Our best “buy for the right install” checklist (so you do not rework it)
Before you commit to truck canopy LED strip installation, run this quick checklist. It keeps you from the classic mistakes, like buying a light that does not match your battery, or mounting in a spot that leaves you with shadows.
- Confirm your battery platform: check whether you have Milwaukee, DeWalt, or Makita 18V packs, then match the adapter system.
- Measure your canopy space: plan where the bar sits for coverage across drawers, sockets, and fittings.
- Clean the surface first: adhesive needs a solid bond surface.
- Pick brightness modes that fit your work: full output for the dark start, lower settings for nearby tasks.
- Check durability rating: IP66-type toughness helps with dust and rain.
- Have a support path: if fitment is unclear, ask before you mount, we reply quickly through contact.
Frequently asked “truck canopy LED strip installation” problems (and fixes)
Even a clean install can have hiccups. Here are the common ones we hear and how to handle them without turning it into a mess.
-
Problem: uneven lighting, dark corners.
Fix: reposition for wider coverage, aim for corner-to-corner distribution instead of straight-line focus. -
Problem: light feels dim even on max.
Fix: confirm correct brightness mode and battery power level, then check if the lens or mounting angle is blocking light. -
Problem: adhesive won’t hold.
Fix: clean the mounting surface properly, mount when surfaces are dry, and press firmly along the whole contact area. -
Problem: battery adapter fitment feels off.
Fix: make sure your battery platform matches the included adapter type for your 18V system.
If you want to sanity-check your plan, read the FAQ where we answer fitment, install, brightness, durability, shipping, and returns. Straight answers, no marketing fluff.
Conclusion
For truck canopy LED strip installation in 2026, the best results come from simple priorities: even light distribution, flush mounting, and a kit that does not force you into wiring headaches. If you want the “open it, stick it in, clip on a battery. Done.” approach, our battery-powered options are built for exactly that daily grind.
Get your install done once, get wide-angle light every morning, and stop fumbling for phones when the blackest 5am start hits. Join the LumoLux crew and light up your rig for less with a clean, fast truck canopy LED strip installation workflow.
Frequently Asked Questions
What’s the easiest truck canopy LED strip installation method in 2026?
The easiest method is a wiring-free setup that mounts with peel-and-stick and clips to an 18V battery platform you already own. In 2026, crews stick with battery-powered truck canopy LED strip installation because it avoids electrical work and keeps the jobsite simple.
Do I need to drill for truck canopy LED strip installation?
No. The best truck canopy LED strip installation approaches use mounting that avoids drilling, so you can fit it cleanly on the canopy or cap. If your kit requires drilling, you may be buying the hard route.
Will a truck canopy LED strip installation really light the whole toolbox area, or just a line?
It depends on placement and how the light is distributed. A good truck canopy LED strip installation targets corner-to-corner coverage, so you see drawers, sockets, and fittings without dark corners.
What battery systems are compatible with battery-powered truck canopy LED strip installations in 2026?
Many battery-powered kits are built around common 18V platforms like Milwaukee, DeWalt, and Makita. For truck canopy LED strip installation, match the adapter to your battery platform so the light can run immediately, no wiring required.
How long does a truck canopy LED strip setup last before you need to replace it?
Rugged flex LED strip style lighting is commonly rated around long lifespans like 50,000 hours, which is about six years of continuous use. For truck canopy LED strip installation, that means less rework and more reliable light across jobsite seasons.
Is IP66 durability important for truck canopy LED strip installation?
Yes, because canopies and tool areas see dust, rain, and rough handling. A truck canopy LED strip installation with IP66-type durability is designed to handle those conditions without skipping a beat.
How do I know the right brightness level for truck canopy LED strip installation?
Pick brightness based on how you work, not just how bright it looks in a store. The best truck canopy LED strip installation kits offer multiple brightness modes, so you can run full output for the blackest 5am start and dial it down for nearby tasks.
